
Here one more tutorial how to make greeting card for your best friends and relatives. Hope, they will be glad to receive greeting card like this one.
So, let’s begin! First of all, create a new document about 800 px width and 500 px height. After that select some appropriate colors, for example colors of #449224, #b5f716 and drag a radial gradient as on my picture you can see below.
After that I would like to add some pattern to the background. Get out the Custom Shape Tool from the Photoshop tools and find the shape from the standard shapes gallery. What you can see on the picture below.
Drag it onto your canvas like I’ve done in the below screenshot, then set up opacity to 70% for this layer
Now, I would like to make a little accent in card centre. For this create a new layer, then select the Elliptical Marquee Tool to create round selection as on my picture below and fill it with color of #d7ff00.
Remove selection with Select > Deselect and apply Filter > Blur > Gaussian Blur.
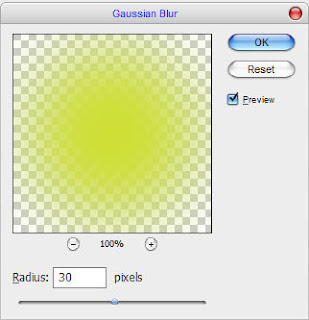
Ok, now we received next effect:

Time to add the numbers. Now, select the Horizontal Type Tool and set up the foreground color as #c32b01. Write out the number two using the AvantGarde font.

After that rasterize this text layer with Layer > Rasterize > Type and apply Edit > Transform > Free Transform to rotate the number, then use Edit > Transform > Distort to bring it in the same projection as on my picture below.
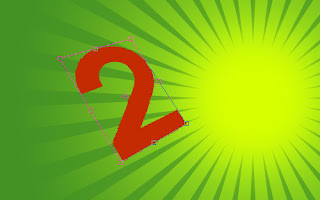
Duplicate layer with Ctrl+J and move lower layer a little bit down and right.

Ok, after that use the Polygonal Lasso Tool to connect the upper part of the number with its projection. After that fill selected area with color of #c32b01.

Apply the Color Overlay layer style to this the current layer.
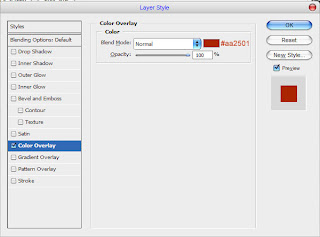
Create a new layer above and merge it with previous to get all affects in one layer.

Now, we can start create volumetric number. Get out the Polygonal Lasso Tool and create selection as on my picture below. Then apply the Burn Tool (Brush: 150 px, Range: Shadow, Exposure: 20%)

Now, change Burn Tool to Dodge Tool (Brush: 150 px, Range: Highlights, Exposure: 50%) and add a little bit bright glare inside of selected area.

Now, create another one selection and use Dodge Tool and Burn Tool again to make the same effect. Process all sides of the number.

Ok, remove selection with Ctrl+D, move to the layer above and use the Burn Tool (Brush: 150 px, Range: Shadow, Exposure: 20%) to add a little gradient to this upper layer.

And the one last thing that we need to do to add the glare to the number. Use the Select > Load Selection to make selection of the current layer, then press Alt+Shift and cut off unnecessary part of selection with Elliptical Marquee Tool. Fill selected area with white to transparent gradi

Remove selection with Ctrl+D and merge all layers of number in one. Then apply the Outer Glow layer style to the new layer.
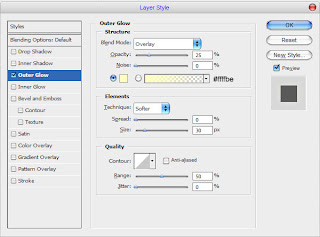
See the difference now?

Ok, add thee more numbers in the same way. I prefer to use different colors for each letter.
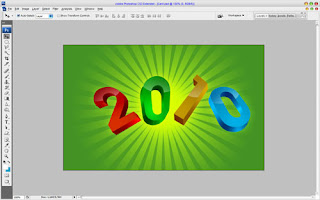
Then reduce a little some numbers with Edit > Free Transform.
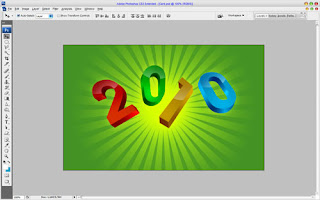
Ok, we are done with numbers. Move to the next step. Select the Horizontal Type Tool and write out the text with white color in the bottom of the canvas as on my picture below (I used the font Annabelle):
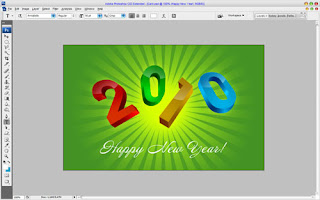
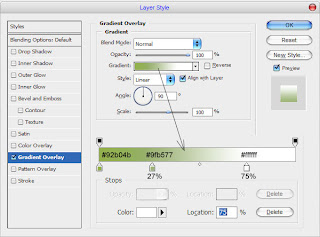
Apply the Gradient Overlay layer style to this layer.

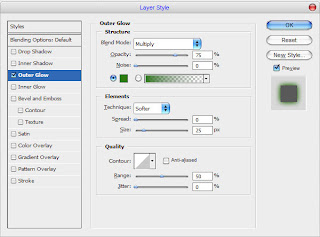
After that duplicate this layer with Ctrl+J and move lower copy two pixels down. After that apply Outer Glow layer style:

To finish off the tutorial I would like to add some decorative elements. I found these balls to use it on the card. Open up this picture and copy to the main canvas.
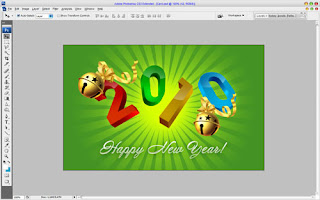
Ok, our greeting card is ready!


No comments:
Post a Comment