In this little Photoshop tutorial we’ll be designing multicolored wallpapers with three-dimensional rainbow effect.
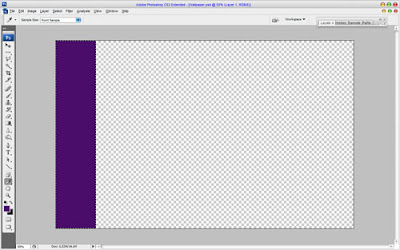
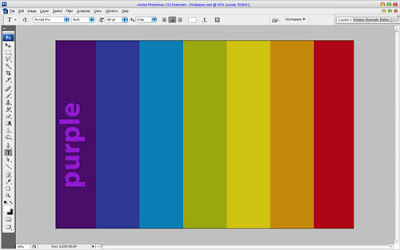
Start by making a new document in Photoshop – around 1900×1200 pixels in size, or, you know, whatever you prefer! Best use the default resolution, though 72. Ok, after that apply the Rectangular Marquee Tool to create selection about 1/7 thick canvas and fill selected area with color of #490d69.
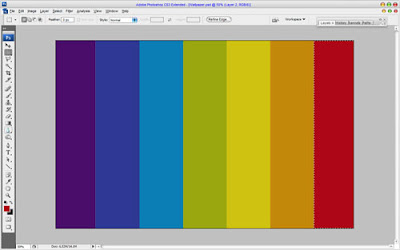
After that create another one the same size selection and fill it with color of
#2e3894.

Add five more different colors lines in the same way. Use following colors for every line:
#0b7eb5,
#9aa70e,
#cfc211,
#c3880a and
#ae0617. Now we get nice rainbow canvas.
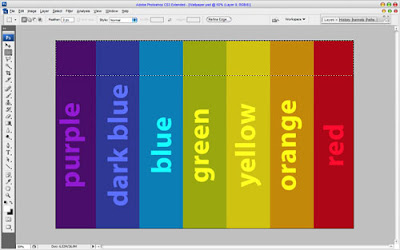
Deselect chosen area with
Ctrl+D. After that get out the
Horizontal Type Tool and write out the first word. It will be purple color name with white color. For this tutorial I used Myraid Pro font.
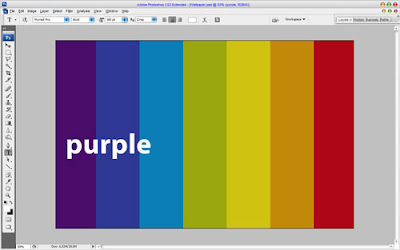
Use
Edit > Transform > Rotate 90 CCW to rotate our text line vertical. Change layer mode to
Overlay for current layer.
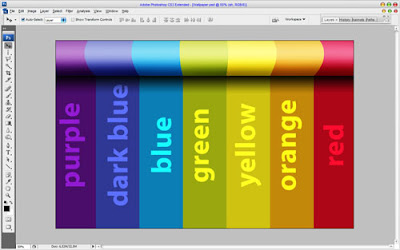
Add more text lines to each line in the same way.

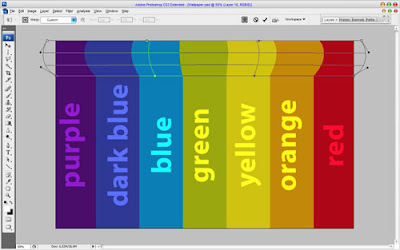
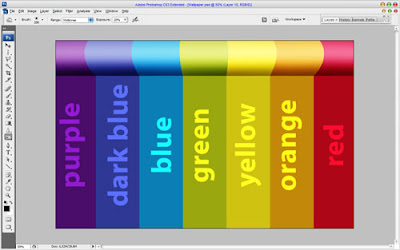
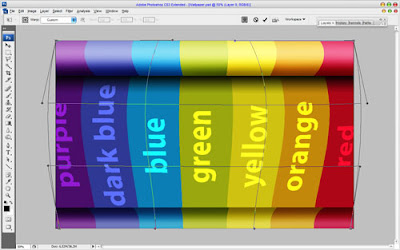
Ok, merge all layers in one. Then use the
Rectangular Marquee Tool to make selection as on my picture below and press
Ctrl+J to duplicate selected part of image to the new layer.
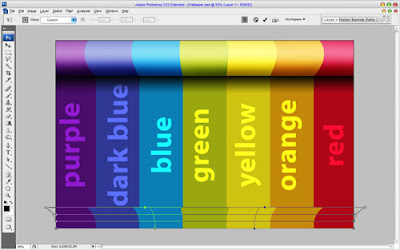
Then apply
Edit > Transform > Warp with following presets as on my picture below:
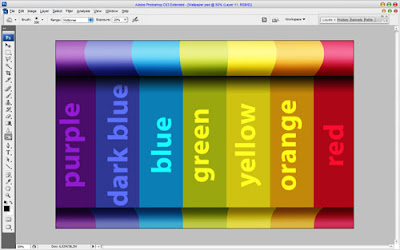
After that use
Dodge Tool (Brush: 300 px, Mode: Midtones, Exposure: 30%) to bring three-dimensional view to this layer.
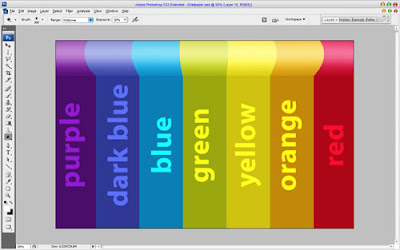
Now, select another one
Burn Tool (Brush: 200 px, Mode: Midtones, Exposure: 20%) to bring some shadow in the bottom.
After that create new layer under the current and fill it with black to transparent gradient to get the shadow from the upper layer.
Looks pretty good, don’t you think? Now go back to the background layer and create one more selection with
Rectangular Marquee Tool. Press
Ctrl+J to duplicate selected part of image to the new layer.

Apply
Edit > Transform > Warp one more time, but use another presets for this layer.
Use the
Dodge Tool (Brush: 300 px, Mode: Midtones, Exposure: 30%) and the
Burn Tool (Brush: 200 px, Mode: Midtones, Exposure: 20%) to add the same effect as for the layer on the top of our wallpapers.
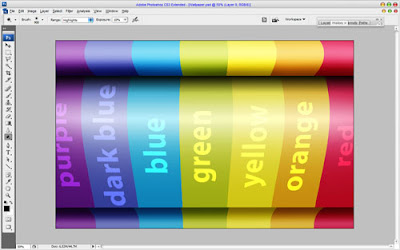
Move to the next step. Go to background layer again and apply
Edit > Transform > Warp again. Use the same presets as you can see on my screenshot below:
After that apply the
Dodge Tool (Brush: 900 px, Mode: Midtones, Exposure: 30%) one more time
Move to the last step. Then select the
Burn Tool (Brush: 500 px, Mode: Midtones, Exposure: 20%) to make a little burn-work again.
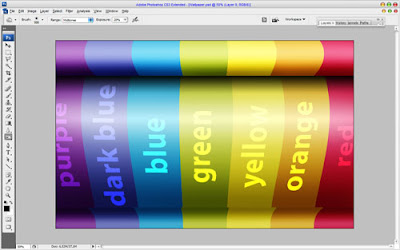
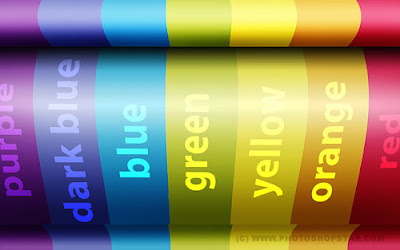
Great! Our work is done! Enjoy your own rainbow colored style wallpaper!

for more information on Adobe Photoshop Tutorial
visit: www.graphicspalace.com


